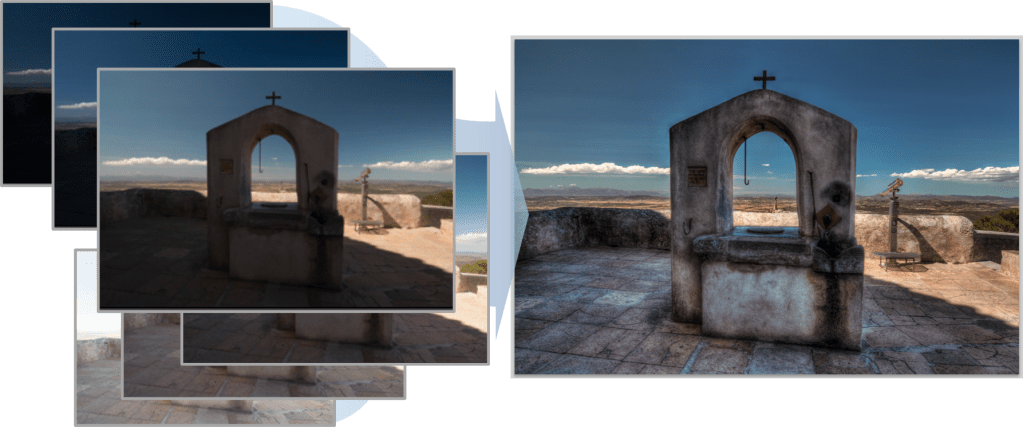
The HDR photography workflow begins with an intention. While I am very much a supporter of the idea to spontaneously take an exposure bracket instead of a single image (even if hand held) and to see what the HDR results look like, your final result is likely to be more satisfactory if you applied a bit more thought before you even grab your camera.
The best way to explain what I mean is that photography (in general, not just HDR) should be about making pictures rather than simply taking pictures. Making pictures is a creative and more mindful process to tell a story, project a feeling or a mood – while the snap-and-go approach of taking a picture will merely provide visual documentation that you have seen something.
- Interesting subjects will make interesting photos – Think about the light, details of structures and surfaces, their texture, the amount of contrast and luminosity across the scene.
- Compose your image carefully – Walk around your subject and explore it. Envision the end result: think about the angle from which you view your subject, consider the background, look for distracting or complementary elements/details. Knowing that you are shooting for HDR can mean that you compose your image differently to capture more of the dynamic range to make a scene more interesting.
Step by Step
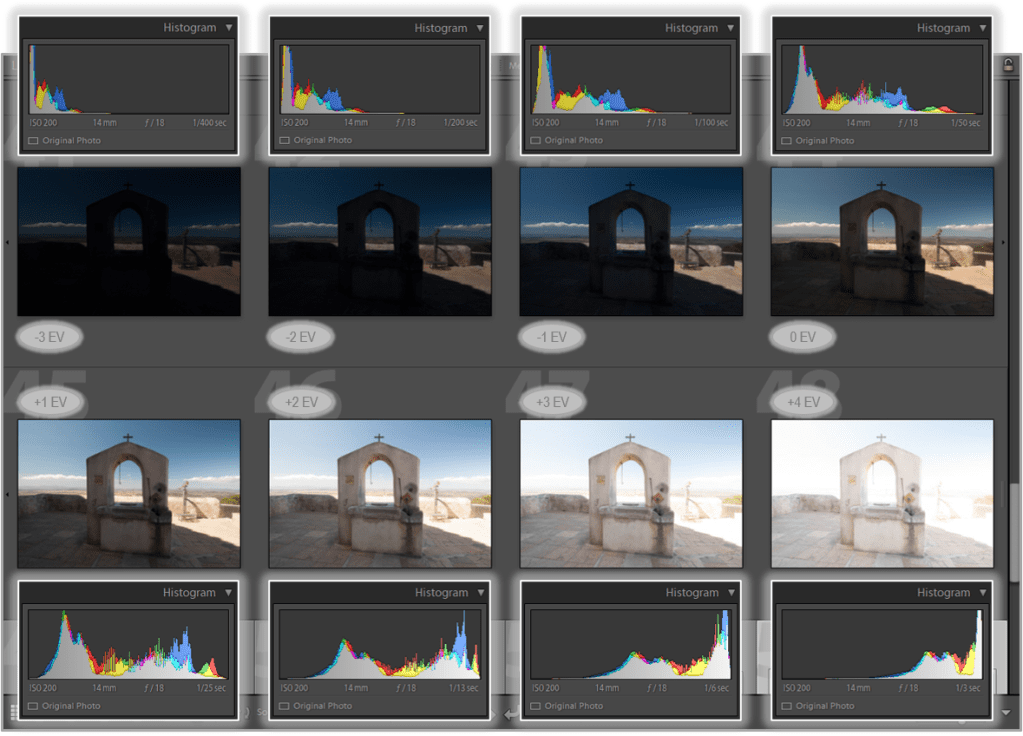
The first thing you want to do is to check the contrast/luminosity range. Switch your camera to spot metering and then focus into the darkest and the lightest parts of the image you plan to capture. The camera readings (exposure time) will tell you the range you should cover with your exposure bracket.
As alluded to in my previous blog post, you should ideally use a tripod and a remote shutter release. Photomatix does a very good job at aligning handheld photos, but using a tripod really is better. If you are not using a remote shutter release, be sure to use the self-timer function of your camera. This is all about creating the sharpest photos possible!
Use a low ISO setting (100 or 200 would be good) and ensure you do not have your camera set to auto ISO. If you are not using a tripod, you should probably use higher ISO for shorter exposure times, but keep in mind that you may have more effort to remove noise.
Be sure to use Aperture Priority or full manual mode of your camera (you do not want varying depth of field in your photo series!). The only thing that should vary in your photo series is the shutter speed.

Use the Auto-Bracketing functionality of your camera.
- After you have checked the exposure for the darkest and lightest parts of the image as described above, you can set your exposure bracket accordingly. Adjust the exposure time for your middle shot if necessary. In case of doubt, you would rather have too broad a range than one too narrow. You do not have to use all exposures in post processing if these do not provide enough data for either the very dark or very light areas of the scene.
- Also check your histogram! Rule of thumb: Your brightest (most overexposed) photo should have shadows in the mid-tones area of the histogram – and your darkest (most underexposed) photo should have properly exposed highlights.
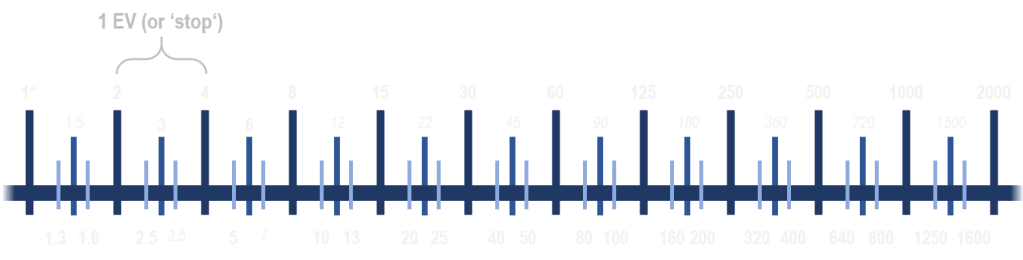
- How many steps should you set to cover the range you have identified? I suggest anything between 1 EV and 2 EV steps. Less than 1 EV between exposures doesn’t really provide any additional detail while steps greater than 2 EV may have the risk of losing some detail. Keep in mind: For a successful recovery of the original dynamic range, the dynamic ranges of individual exposure slices have to overlap.
- I find that I will very rarely take a bracket of only 3 pictures (1.7 or 2.0 EV steps) – usually 5 or 7 exposures with 1 EV steps. My camera also offers a bracket of 9 exposures, but I have not needed that so far.
Once you have composed your image and everything is set up, turn the autofocus off and also turn off the auto white balance. Turning autofocus off is mainly to have less delay between shots and with that less movement in any part of your photo. If you forget to turn off the auto white balance, don’t worry as this can be corrected in your photo editing software.
Checklist
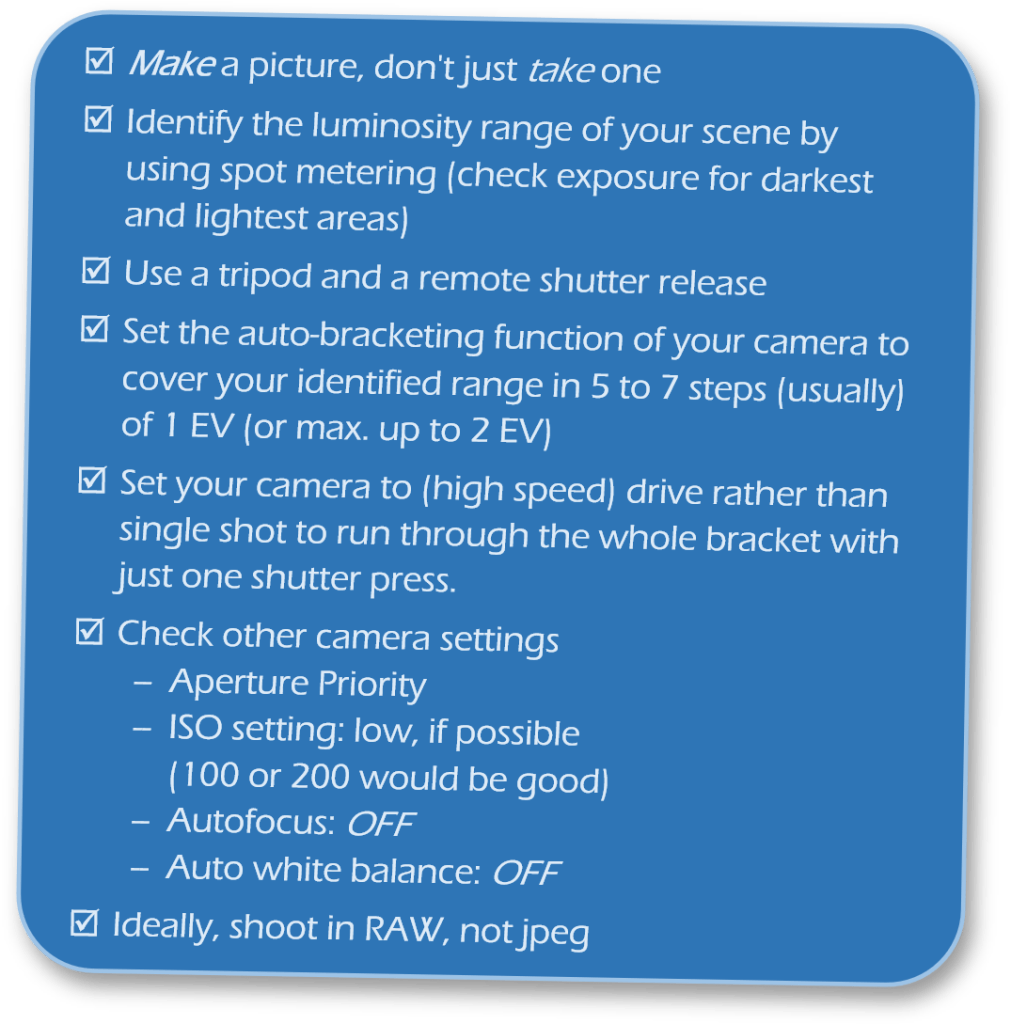
Summarising the key points to keep in mind of this part of the HDR workflow – Capturing the Images:
It is really worthwhile to be mindful when creating HDR images – this applies to every single step of the process. And some of the above will also save you time in post-processing.
Be creative and experimental: try HDR even when you don’t really think you need it. Try out different compositions and use the contrast range to benefit and enhance the picture you want to make, the story you want to tell!
